
WEEK 02
February 13, 2026 - February 19, 2026
Jade Seal: Process, Mask and Construct
Objectives
Process the Jade Seal Scans in RawTherapee
Mask out the Tassel from the Jade Seal in Nuke
Construct a 40 Million Clean Master to start generating LOD00, Ultra and High Res meshes
Part 1: Process the Jade Seal Scans in RawTherapee
I. Organizing and Sort Scanning Data
A. Import and Organize Data
Loaded the Jade Seal scan folder into RawTherapee, filtered for RAW files, and reviewed metadata. Organized images into lighting reference, calibration charts, cross-polarized, and parallel-polarized groups.
For issues with long loading time or scan photos, reducing the cache helped a lot.
Preferences on bottom left -> File Browser -> Cache options and reduce the max cache to 500 - 1000
B. Rank and Sort Images
Assigned ranking labels to separate ColorChecker references, lighting photos, cross-polarized scans, and parallel-polarized scans for correct calibration grouping.
II. White Balance Calibration
Opened a properly exposed ColorChecker image, sampled the neutral grey patch, and applied the white balance to the corresponding image set.
III. Convert RAW to DNG
Converted the required ColorChecker RAW files to DNG using Adobe DNG Converter and saved them to the DNG exports folder.
IV. Camera Profile Calibration
A. Generate Camera Profiles
Created separate camera profiles from the ColorChecker DNG files for lighting reference, cross-polarized, and parallel-polarized setups.
B. Apply Camera Profiles
Loaded the appropriate custom input profile for each image group in RawTherapee.
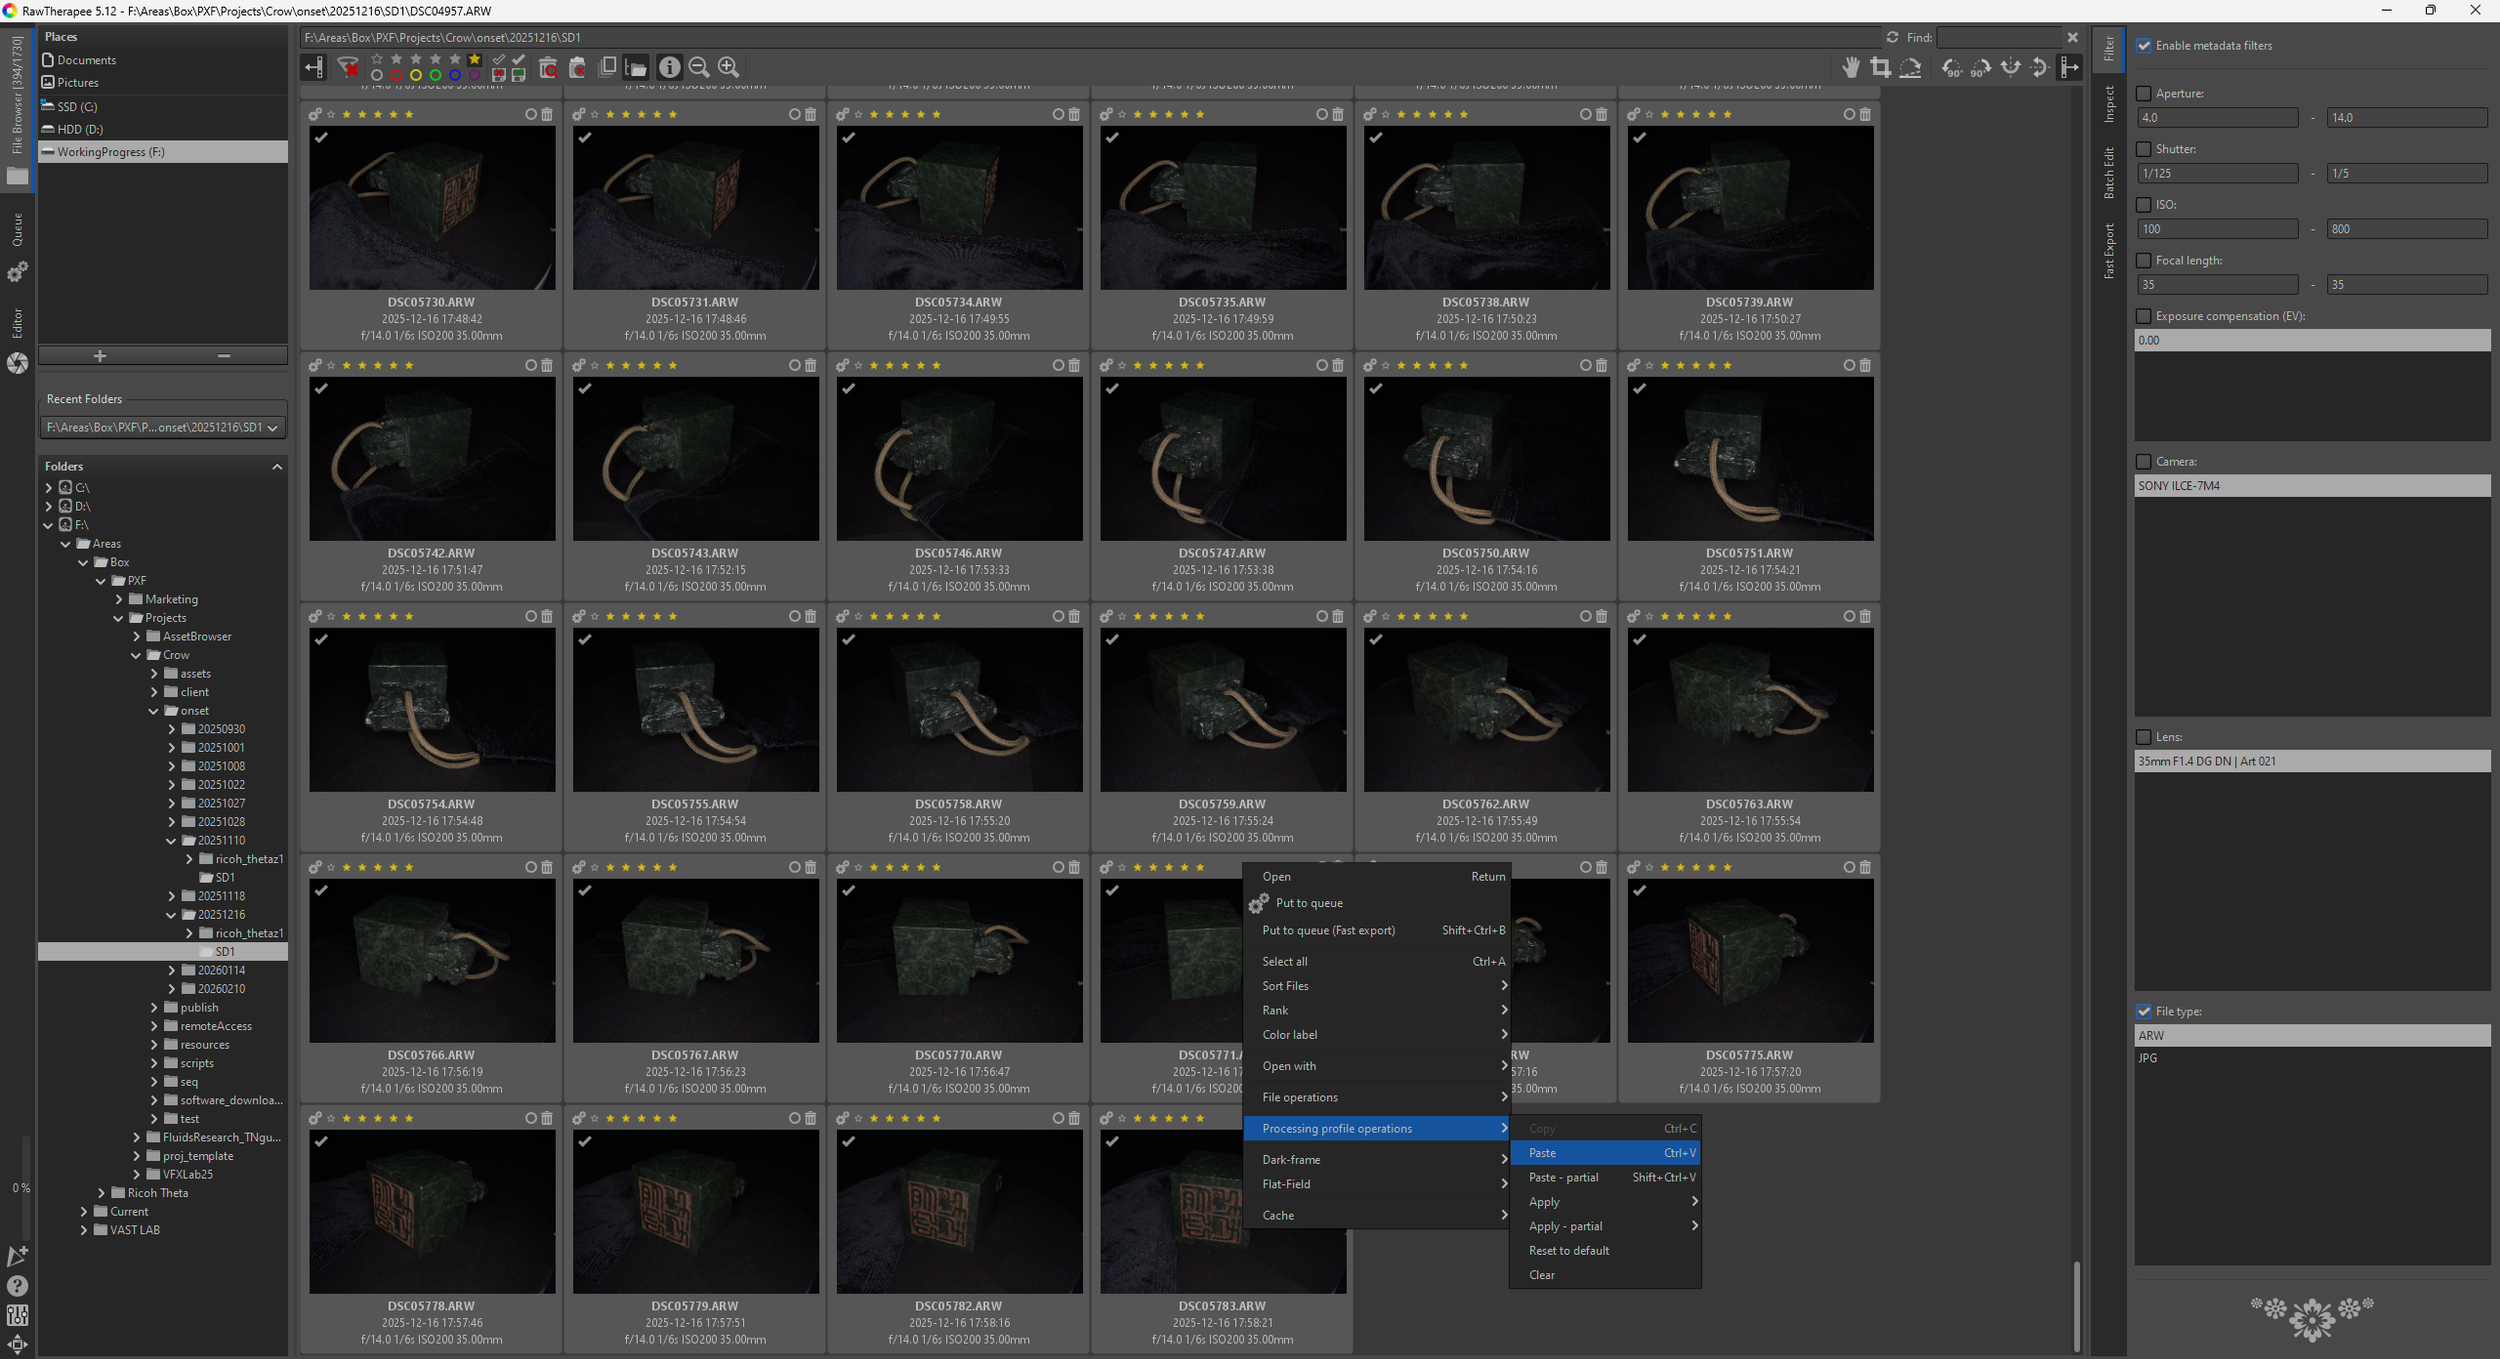
V. Batch Apply Settings
Copied the finalized processing profile and pasted it across each corresponding image set.
VI. Queue and Export Images
Added processed images to the Queue, set export format (PNG 16-bit), defined the destination folder, and ran the batch export.
Part 2: Mask out the Tassel from the Jade Seal in Nuke
Using Nuke, mask out the tassel from the Jade Seal
Prepare mask images for the Jade Seal scan that exclude the attached tassel so that only the seal geometry contributes to the RealityScan reconstruction.
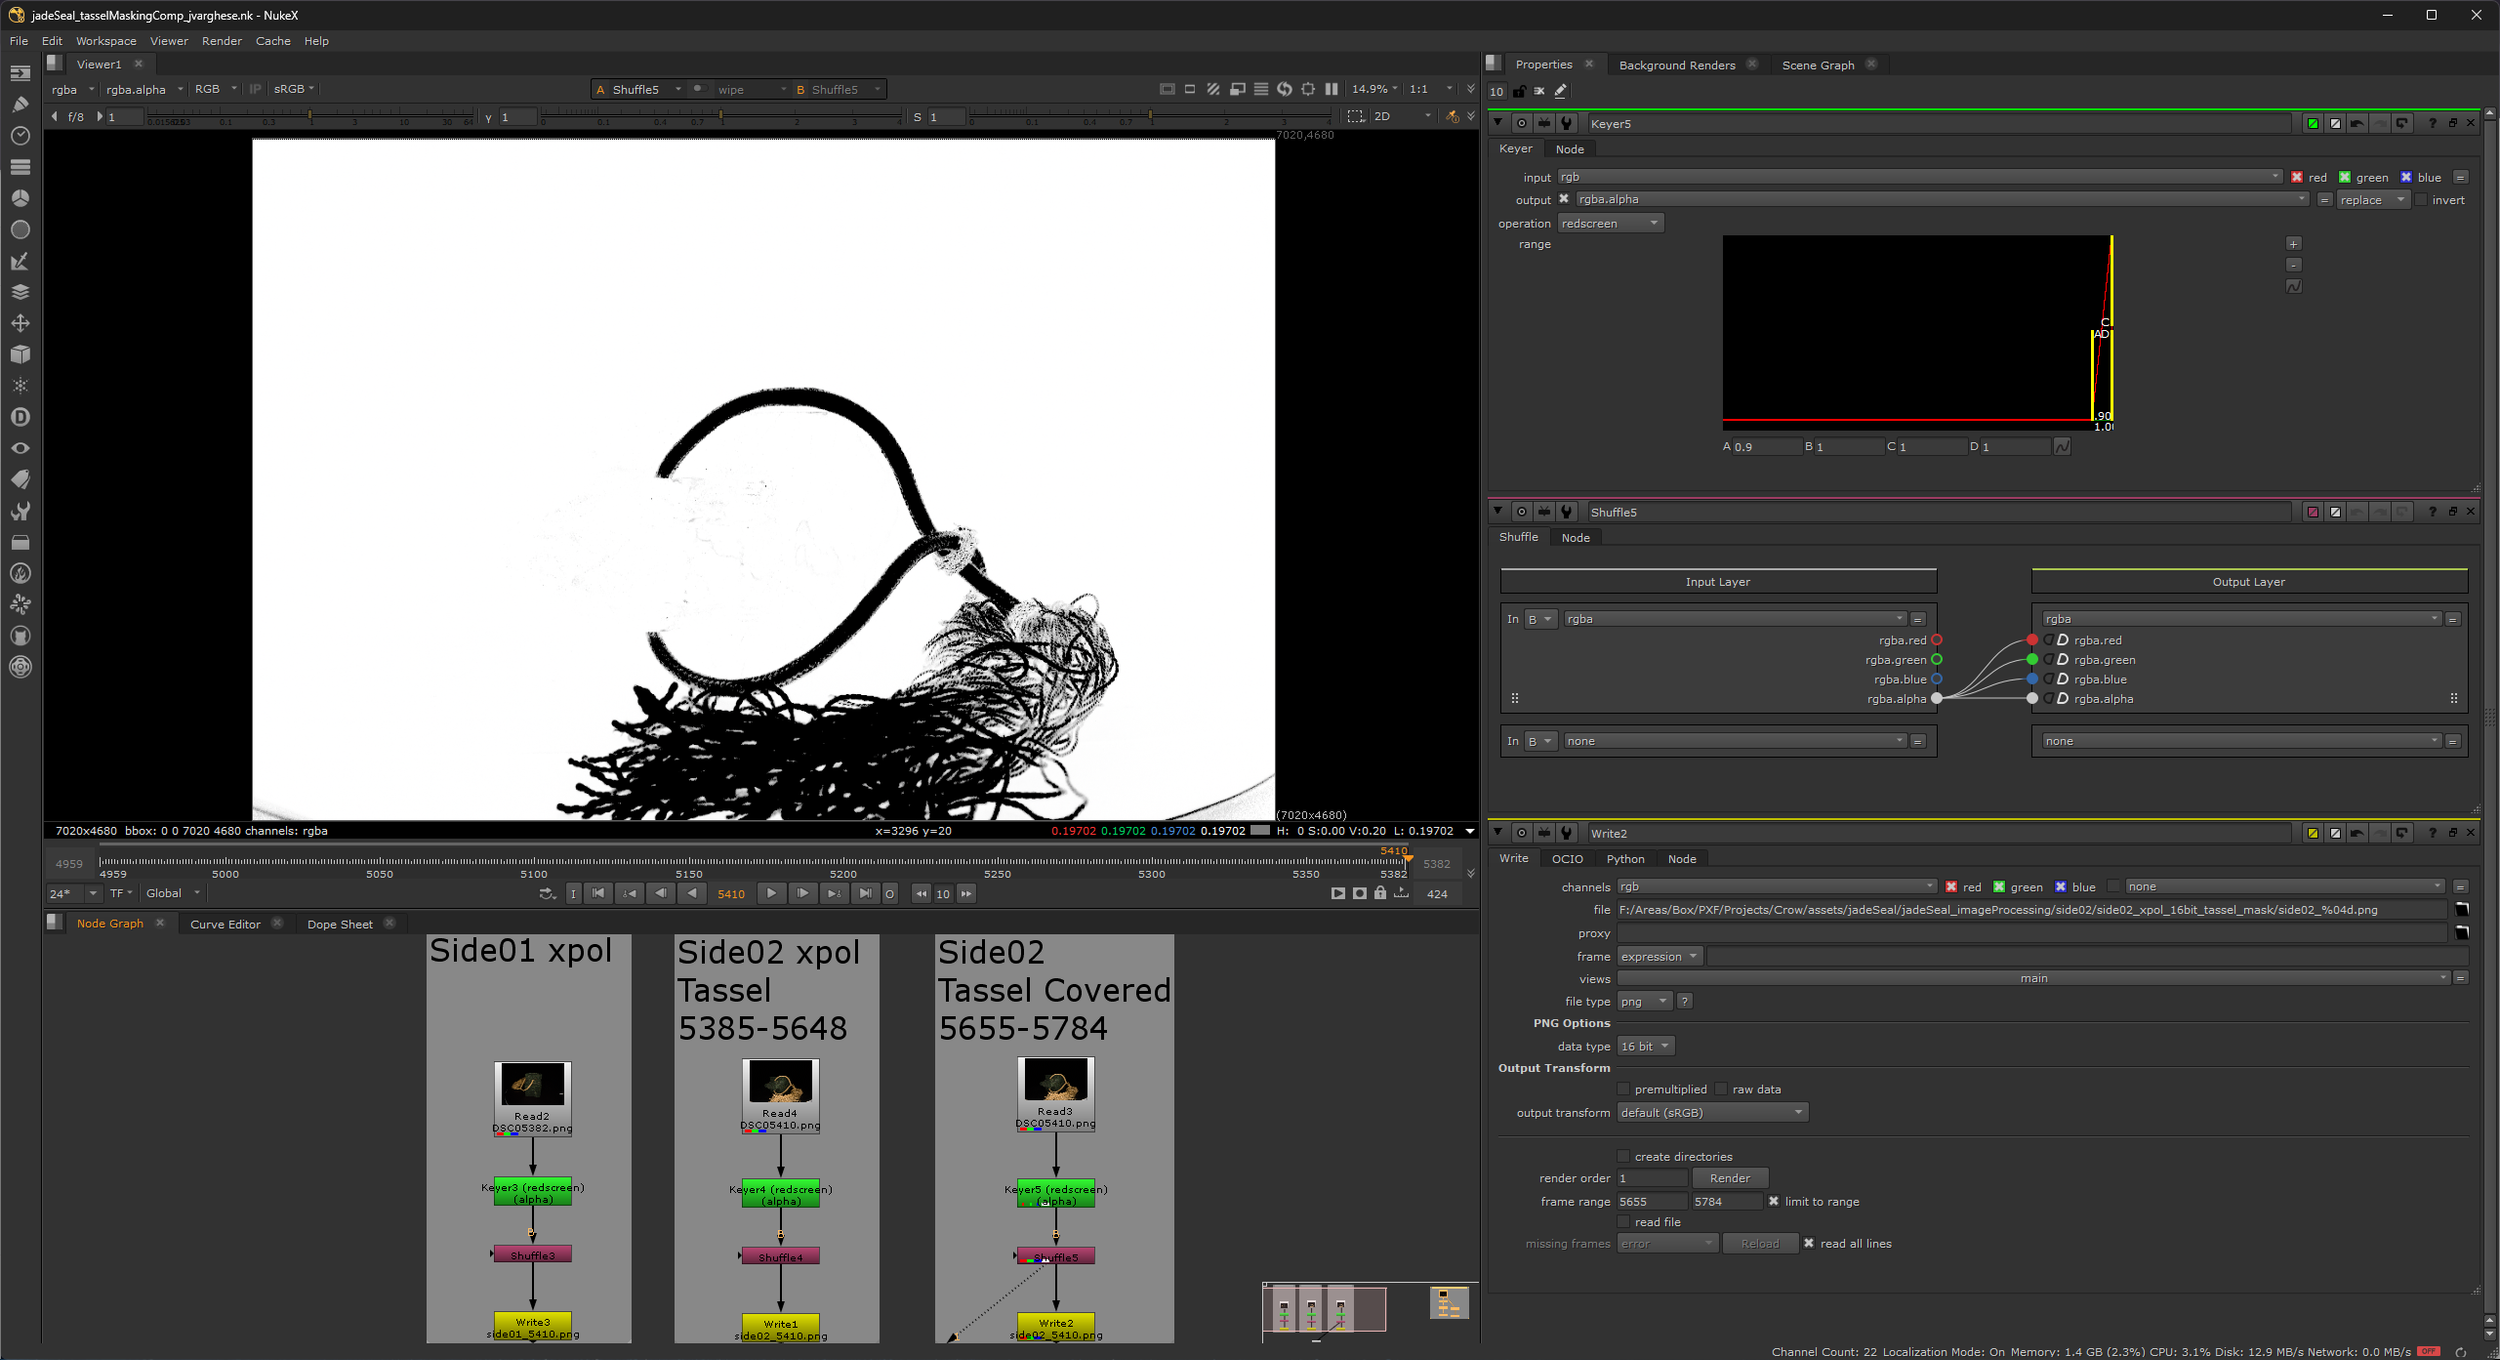
1. Load Scan Images
Imported the cross-polarized Jade Seal scan images into Nuke using Read nodes. These images show the seal against a bright background, allowing the object silhouette to be extracted.
2. Generate Initial Matte
Applied a Keyer node to extract the object silhouette from the background.
The keyer isolates the darker object (seal + tassel) from the bright background and generates an alpha channel representing the full object shape.
3. Prepare Mask Channels
Used a Shuffle node to correctly route the generated alpha into the output channels. This ensures the matte is clean and formatted properly for export as a mask image.
4. Dialing in the Matte
Adjusted the Keyer node settings by testing different operation types and tuning the range controls until the darker object (seal + tassel) was cleanly separated from the bright background. The settings were refined to produce a clear distinctive alpha channel representing the full object silhouette, ready for export as the final mask.
5. Export Mask Sequence
Used a Write node to export the masks as 16-bit PNG sequences.
Each mask outputs a black-and-white image where:
White = reconstruction area (jade seal)
Black = ignored region (background and tassel)
These mask sequences were then prepared for import into RealityScan as image mask layers.
The final output is a clean mask sequence isolating only the jade seal geometry, ensuring the tassel does not influence alignment or mesh generation during photogrammetry processing.
There will be a total of two mask PNG sequences, generated from the 16-bit xpol scan images, which will be used as a common mask for jadeSeal_ppol_wb_cc_16bit, jadeSeal_xpol_wb_cc_16bit, jadeSeal_xpol_wb_cc_8bit sequences:
Side01
Side02
Part 3: Construct a 40 Million Clean Master Mesh in RealityScan
Construct a 40 Million Clean Master Mesh in RealityScan to start generating LOD00, Ultra and High Resolution meshes
Phase 1: Organizing Image Layers
After completing white balancing and camera calibration, the processed images were organized into a parent folder named layers. RealityScan uses a strict naming convention to automatically stack geometry, texture, and mask image layers during import, so the folder structure must follow the required format.
Required Folder Structure:
_geometry!XPOL: Contains 8-bit PNGs(or 8-bit JPGS if converted in Reality Scan) of your cross-polarized images.
_texture@PPOL/: Contains 16-bit white balanced and camera calibrated parallel-polarized images.
_texture@XPOL/: Contains 16-bit white balanced and camera calibrated cross-polarized images.
_mask/: (Optional) Contains PNG masks if cleanup is required.
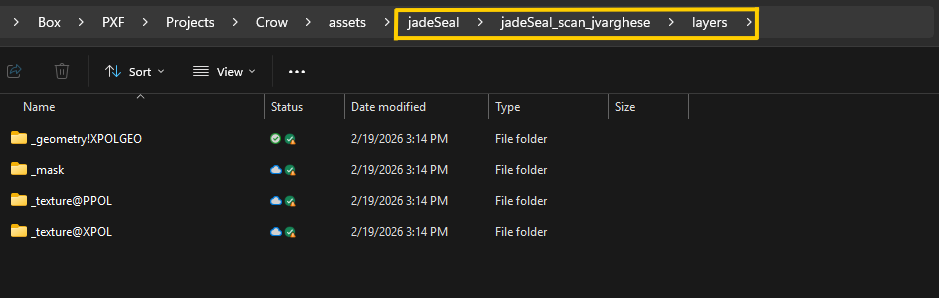
To ensure proper layer stacking, every image across these folders must share the exact same filename. Each capture must correspond one-to-one across geometry, texture, and mask layers so RealityScan can correctly associate the images during processing. (e.g., jadeSeal_01.jpg in geometry must match jadeSeal_01.png in textures).